Remote Access to OT Link Platform
Estimated reading time: 3 minutes
Learn how to configure OT Link Platform for remote access using these instructions:
Why Configure Remote Access?
Using a software-defined private network, OT Link Platform Remote Access lets you:
- Access OT Link Platform software, no matter where in the world it resides.
- Diagnose OT Link Platform issues without requiring on-premise intervention.
Using the network’s unique Node ID as a secure token, an end-to-end handshake between devices ensures a direct, secure connection.
Configure Cloud Connectivity
To configure remote access, you must first set up OT Link Platform - Workload Orchestrator connectivity. Follow the steps described in Activate a OT Link Platform Device for Workload Orchestrator Connectivity. Make sure that the Workload Orchestrator device model is an MQTT plain TCP model at a minimum.
Below are the MQTT connection parameters for the Workload Orchestrator device model:
{
  "mqttHostName": "%MQTT_HOST%",
  "mqttTcpPort": "%MQTT_TCP_PORT%",
  "mqttUserName": "%MQTT_USERNAME%",
  "mqttPassword": "%MQTT_PASSWORD%",
  "mqttClientId": "%MQTT_CLIENT_ID%",
  "mqttReqTopicName": "%MQTT_REQ_TOPIC%",
  "mqttRespTopicName": "%MQTT_RESP_TOPIC%",
  "mqttDataTopicName": "%MQTT_DATA_TOPIC%",
  "remoteNetwork": "%REMOTE_NETWORK%"
}
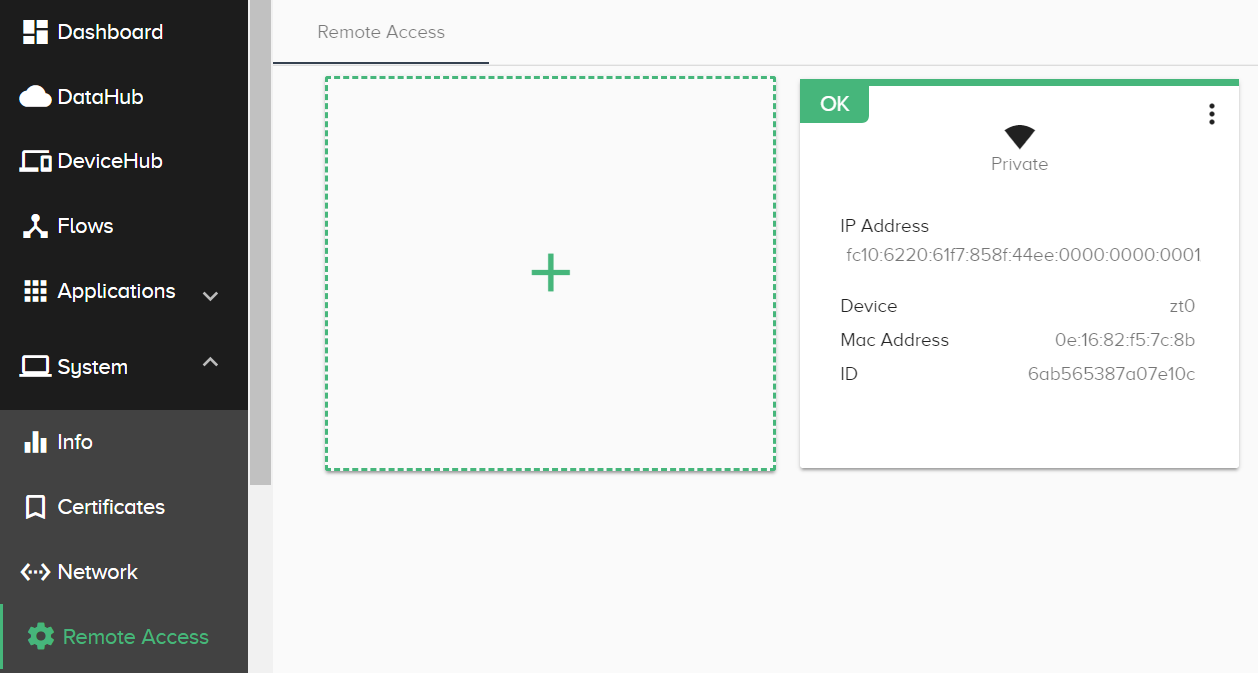
Once you have followed the steps in Activate a OT Link Platform Device for Workload Orchestrator Connectivity to activate the OT Link Platform device on Workload Orchestrator, go to System > Remote Access in the OT Link Platform navigation panel. A network card shows the activated network.
Configure a Workload Orchestrator Network for Remote Access to OT Link Platform
When you create this network, you can connect Workload Orchestrator to OT Link Platform devices, no matter where they reside in the world. Once configured, you easily can access and securely manage and troubleshoot your OT Link Platform software without being co-located with the device.
Prerequisites
- Contact your HPE representative to get the Workload Orchestrator RemoteAccess application to set up a network.
The following high-level diagram illustrates the basic steps required to configure remote access to OT Link Platform. Detailed steps are listed below the diagram.

Steps to Configure OT Link Platform Remote Access
To configure this network, you will once again need to switch between Workload Orchestrator and OT Link Platform. In addition, you will use the Workload Orchestrator RemoteAccess application to get network node IDs.
In Workload Orchestrator RemoteAccess App
-
Copy the network Node ID.
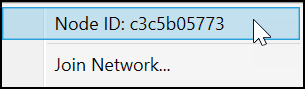
This unique ID serves as a token to authorize the Workload Orchestrator to join the secure private network.
In Workload Orchestrator
-
In the Workload Orchestrator navigation panel, click Remote.
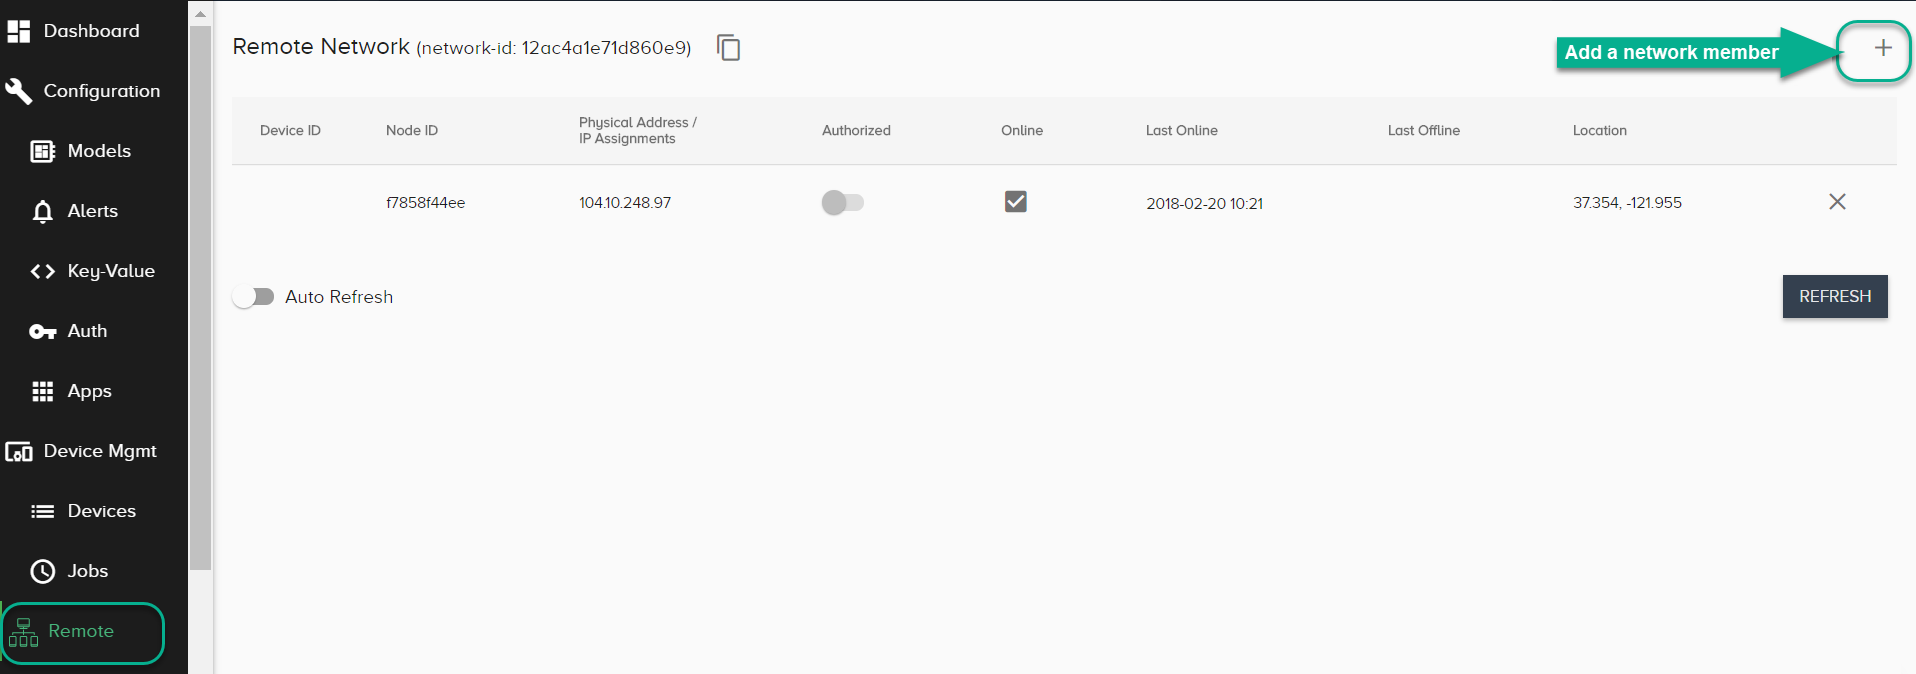
- Click the + icon in the upper right of the window to add a member to the network.
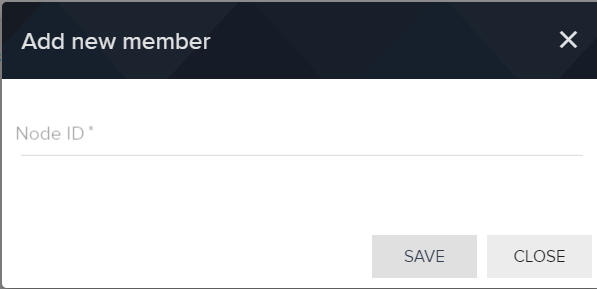
-
In the Add new member dialog, paste the Node ID that you copied from the Workload Orchestrator RemoteAccess service and click Save.
The node will be listed in the Remote Network list, as part of your network.
-
At the top of the Workload Orchestrator Remote Network window, click the
 icon to copy the network ID.
You will use this ID in the next step, in the remote access service, to join the network. This establishes the handshake between the private network and the Workload Orchestrator.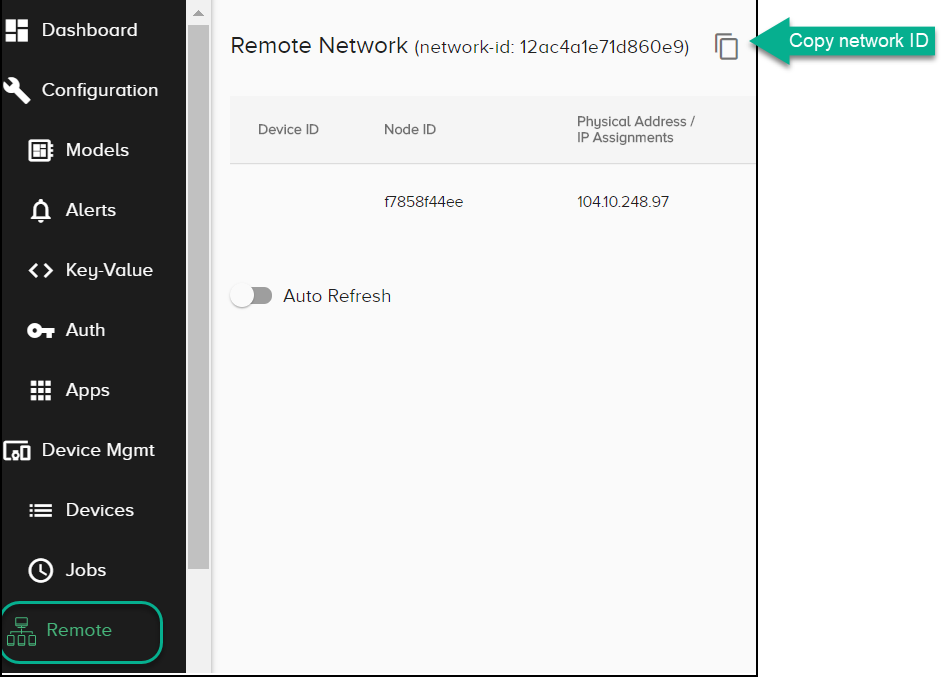
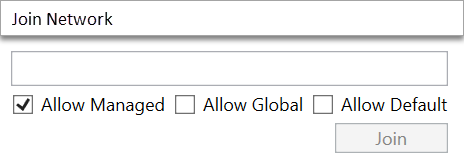
In Workload Orchestrator RemoteAccess
-
In the RemoteAccess application, select Join Network and paste the network ID that you copied from Workload Orchestrator.
In OT Link Platform
-
In the OT Link Platform navigation panel, expand System and click Remote Access. A network card will be displayed with an IPv6 address.

- Select and copy the IPv6 address from the displayed Remote Access network card.
-
To remotely access the OT Link Platform device, enter the IPv6 address _enclosed in square brackets _into the address/search bar of a web browser.
Example:
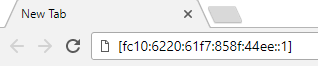
This IPv6 address is the only address that will be used to remotely access OT Link Platform.